Latest: Facebook Like Our Facebook Page For More Updates! | Twitter: @Tech_Terms
Showing posts with label Windows. Show all posts

Wednesday, 24 October 2012

New 2012 iMac Knockoff Features Sandy Bridge Processor, Windows 8 And More


With scarcely 24 hours having passed since Apple announced a glut of product updates at its specially-arranged keynote event in San Jose, it was almost inevitable the knockoff makers wouldn’t be too far behind. While the first plausible iPad mini knockoff has already reared its head, it’s not so common for us to see bootleg Macs unveiled so soon after the official announcement.
Being the most valuable company in the world does have its drawbacks, and one issue the Cupertino-based company constantly faces is the cloning of its products. China, among other nations, churn out a variety of popular products illegally, in an illicit trade worth billions of dollars a year, and although many of us will have seen a fake Louis Vuitton bag or Ray Ban shades, the idea of a copied iMac might be an entirely new concept to some.

Although we anticipated some changes with the company’s most celebrated desktop, nobody foresaw a complete overhaul, and as well as ditching the optical drive, throwing in USB 3.0, Ivy Bridge and the option of an all-new “Fusion” SSD/HDD collaborative effort, the new iMac is also significantly thinner than it has ever been.


The knock-off makers haven’t managed reach the standards of the wonderfully-crafted newdesktop, but as has been the case increasingly of late, the wannabe iMac is, in terms of tech spec, not bad at all. Gone are the days where a knockoff aimed only to look like the product it resembled, because the bootleggers are actually packing in respectable hardware to boot.


The unofficial iMac, which is actually a PC running Windows 8, boasts a 21.5-inch 1920×1080 display, and can be powered by Intel’s Sandy Bridge core processors. Apple may have ditched Sandy bridge entirely from its commercial computing range, but the older processor is certainly no pushover, and with 4GB of RAM, a 500GB hard drive, and four USB 2.0 ports, it provides most of the necessities of the everyday user. Granted, the VGA port doesn’t quite fit in when alternatives include Thunderbolt and HDMI, but with a stylish aluminum shell, it looks respectable enough.
One can choose between Windows 7 or Windows 8, although it’s unknown as to whether the display is touch-optimized to suit Microsoft’s soon-to-be-released operating system.
(via MICGadget) (source Shanhaiben)
You can follow us on Twitter, or like our Facebook page to keep yourself updated on all the latest from Microsoft, Google, Apple and the web.

Monday, 5 September 2011

Trippling Your Download Speeds

Here is how to triple ur speeds.

I went from 190kb/s up to 600kb/s so that should tell you something

If it damage your computer, I take no responsibility

open notepad and paste the following

REGEDIT4
[HKEY_LOCAL_MACHINE\SYSTEM\CurrentControlSet\Services\Tcpip\Parameters]
"TcpWindowSize"=dword:faf0
"Tcp1323Opts"=dword:0


Save this file with the name tweak.reg

Right click and click install

Reboot ur comp for it to take effect
TO UNDO THE CHANGES
If you want to undo it, incase it messed u up,
COPY THE CODE BELLOW IN NOTEPAD
save the file u will make bellow in the name undo.inf


[Version]
signature=$CHICAGO$

[DefaultInstall]
DelReg=Delete_Reg_Entries


[Delete_Reg_Entries]
HKLM,System\CurrentControlSet\Services\Tcpip\Parameters,TcpWindowSize
HKLM,System\CurrentControlSet\Services\Tcpip\Parameters,Tcp1323Opts


Right click on undo.info and click install (to undo tweak)

Reboot ur comp for it to take effect

Many have tried it but it worked only for half of them

Lock Your System On Mouse Click

Lock your System on Mouse Click

Feel hard to press CTRL+ALT+DEL to lock your machine ??????
Try this and create the icon to lock the machine.


1. Right click an empty spot on the desktop, point to New and click Shortcut.

2. In the Create Shortcut dialog box, type the following in the 'Type the location' of the item text box:

"rundll32 user32.dll,LockWorkStation" remove quotes while typing.

3. Click Next.

4. In "Type a name for this shortcut", type "" (any name as u wish) and Click Finish

5. Create a shortcut in your shortcut bar & use it

NTLDR or NTDETECT.COM Not Found

If you get an error that NTLDR is not found during bootup,

If you have FAT32 partitions, it is much simpler than with NTFS.
Just boot with a Win98 floppy and copy the NTLDR or NTDETECT.COM files
from the i386 directory to the root of the C:\ drive.

For NTFS:

Insert and boot from your WindowsXP CD.
At the first R=Repair option, press the R key
Press the number that corresponds to the correct location for the installation of Windows you want to repair.
Typically this will be #1

Enter in the administrator password when requested
Enter in the following commands (X: is replaced by the actual drive letter that is assigned to the CD ROM drive.
COPY X:\i386\NTLDR C\:
COPY X:\i386\NTDETECT.COM C:\
Take out the CD ROM and type exit

Corrupted or Missing \WINDOWS\SYSTEM32\CONFIG

If you get the error:
Windows could not start because the following files is missing or corrupt
\WINDOWS\SYSTEM32\CONFIG\SYSTEM or \WINDOWS\SYSTEM32\CONFIG\SOFTWARE

Insert and boot from your WindowsXP CD.
At the first R=Repair option, press the R key
Press the number that corresponds to the correct location for the installation of Windows you want to repair.
Typically this will be #1
Enter in the administrator password when requested
cd \windows\system32\config

Depending on which section was corrupted:
ren software software.bad or ren system system.bad
Depending on which section was corrupted
copy \windows\repair\system
copy \windows\repair\software
Take out the CD ROM and type exit

HAL.DLL Missing or Corrupt

If you get an error regarding a missing or corrupt hal.dll file, it might simply be the BOOT.INI file on the root of the C: drive that is misconfigured

Insert and boot from your WindowsXP CD.
At the first R=Repair option, press the R key
Press the number that corresponds to the correct location for the installation of Windows you want to repair.
Typically this will be #1

Type bootcfg /list to show the current entries in the BOOT.INI file
Type bootcfg /rebuild to repair it
Take out the CD ROM and type exit

NTOSKRNL Missing or Corrupt in Windows XP

If you get an error that NTOSKRNL not found:

Insert and boot from your WindowsXP CD.
At the first R=Repair option, press the R key
Press the number that corresponds to the correct location for the installation of Windows you want to repair.
Typically this will be #1
Change to the drive that has the CD ROM.
CD i386

expand ntkrnlmp.ex_ C:\Windows\System32\ntoskrnl.exe
If WindowsXP is installed in a different location, just make the necessary change to C:\Windows
Take out the CD ROM and type exit

Windows Xp Repair, How to repaire windows XP without installation

Some Windows XP Repair Tricks ........

Repair Install
If XP is corrupted to the point where none of the previous solutions get it to boot,
you can do a Repair Install that might work as well as keep the current settings.
Make sure you have your valid WindowsXP key.
The whole process takes about half an hour depending on your computer
If you are being prompted for the administrator's password, you need to choose the 2nd repair option, not the first.


Insert and boot from your WindowsXP CD
At the second R=Repair option, press the R key
This will start the repair
Press F8 for I Agree at the Licensing Agreement
Press R when the directory where WindowsXP is installed is shown. Typically this is C:\WINDOWS
It will then check the C: drive and start copying files
It will automatically reboot when needed. Keep the CD in the drive.
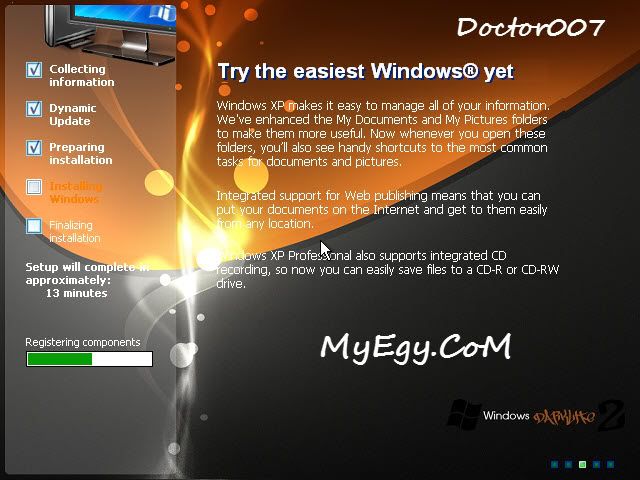
You will then see the graphic part of the repair that is like during a normal install of XP (Collecting Information, Dynamic Update, Preparing Installation, Installing Windows, Finalizing Installation)
When prompted, click on the Next button
When prompted, enter your XP key
Normally you will want to keep the same Workgroup or Domain name
The computer will reboot
Then you will have the same screens as a normal XP Install
Activate if you want (usually a good idea)
Register if you want (but not necessary)
Finish
At this point you should be able to log in with any existing accounts.

Hide All The Desktop Icons

Here is a simple trick to hide all your desktop icons .
Just go to Start->run.Type regedit.

Go to HKEY_CURRENT_USER,then go to Software,then M*cro$oft,then to Windows,go to Current version,then policies and then click on explorer.

On the right hand side,right click and click on New.Then select DWORD value.
Rename this value as "NoDesktop" (without the quotes).Click on it and set its value to 1 in the value data space.Now restart your pc or just log off and log in back.

You will see that all your Desktop icons are gone.
To get back your icons,go to the DWORD value you created,now either delete it or set its value to 0.

In both cases you will get back all your icons.Try it out.

Alt-shift-print Screen - A Scary Keybrd Shortcut For Windows

The Print Screen key [PrtScn] takes a snapshot of the entire computer screen and copies it to the Windows Clipboard. Hold down Alt and press the Print Scrn key to capture just the active window.

So far so good. Now try this combination - Press Alt, Shift and Print Screen together. And don't worry, you can always restore your previous desktop theme by pressing the same keyboard shortcut again.

How To Remove and Add Right-Click Menu Items from Files and Folders

Removing Items
A lot of programs you install will add themselves to the right-click menu of your files and/or folders. And most times, you have no choice in the matter and, as a result, your right-click menu can get very long with added items you don't even use. The last person I was helping with this had a right context menu so long that the Rename option was no longer visible!
Fortunately, you can easily remove those unwanted menu items, if you know the registry values to edit. And it's not at all difficult once you know the keys responsible for the additions.

For Files, the secret lies in the "context menu handlers" under the shellex subkey for "All Files" which, in the registry, is nothing but an asterisk - like a dos wildcard, which means the values entered apply to all files. It is at the very top of the Root key, right here:


HKEY_CLASSES_ROOT\*\shellex\ContextMenuHandlers

Click the the + sign next to the ContextMenuHandlers key, to expand it.
Now you will see some of the programs that have added items to your right-click menu. Simply delete the program keys you don't want. 
Yup! It's that simple. If deleting makes you uneasy, just export the key before deleting it. Or, instead of deleting the values, disable them. Simply double click the default value for the program on the right hand pane and rename the clsid value by placing a period or dash in front of it.
ie; - {b5eedee0-c06e-11cf-8c56-444553540000}
Then exit the registry, refresh, and right click a file to see if the item was removed from the menu.
Some programs - like WinZip or WinRar - will add several items to your right click menu but all of them will be removed by deleting or disabling their one context menu handler. 

Note that the above key only applies to the right click menu of files.
To remove entries from the right click context menu of folders, you need to navigate to the Folder and Drive keys:

HKEY_CLASSES_ROOT\Folder\shellex\ContextMenuHandlers
HKEY_CLASSES_ROOT\Drive\shellex\ContextMenuHandlers

All you have to do is follow the same procedure as for Files - either disable or delete items you wish to remove.
Adding Items
Adding Items to the right click menu of Files and Folders is also fairly simple using the Registry. It just involves the creation of a few new keys for each item you wish to add. You edit the same keys used for removing items. Let's use Notepad as an example of an item you'd like to add to the right click menu of all your files or folders.

For folders, go to this key:
HKEY_CLASSES_ROOT\Folder
Click the + sign next to Folder and expand it so that the Shell key is visible. Right click the Shell key and choose New>Key and name the key Notepad or whatever else you'd prefer (whatever the key is named is what will appear in the right-click menu). Now right click the new key you made and create another key named Command. Then, in the right hand pane, double click "Default" and enter Notepad.exe as the value.
Exit the registry, refresh, and right click any folder. Notepad should now be on the context menu.


For files, go here again:

HKEY_CLASSES_ROOT\*
Expand the * key and see if a Shell key exists. If it does exist, follow the same procedure as for folders. If it does not exist, you'll have to create a new Shell first. Just right click the * key and choose New>Key and name it Shell. Then right click the Shell key and continue on the same way you did for adding items to the right click menu of folders.
Once done, Notepad should appear as an option in the right click menu of all your files.

Disable the Windows Logo Key

i was recently playing games and this nasty windos logo key keep annoying me , cause i often accidently clicked it , and i start to search a solution to solve my problem, and found the following article in microsfot website, and it did work, hope this helps, thanks!


CODE
http://support.microsoft.com/?kbid=181348


or in other articles, u can copy the following messages into ur notepad and save as *.reg, and use it..

Windows Registry Editor Version 5.00

[HKEY_LOCAL_MACHINE\SYSTEM\CurrentControlSet\Control\Keyboard Layout]
"Scancode Map"=hex:00,00,00,00,00,00,00,00,03,00,00,00,00,00,5b,e0,00,00,5c,e0,\
00,00,00,00

how to Delete An "undeletable" File easily

Delete An "undeletable" File
Open a Command Prompt window and leave it open.
Close all open programs.
Click Start, Run and enter TASKMGR.EXE
Go to the Processes tab and End Process on Explorer.exe.
Leave Task Manager open.

Go back to the Command Prompt window and change to the directory the AVI (or other undeletable file) is located in.
At the command prompt type DEL <filename> where <filename> is the file you wish to delete.
Go back to Task Manager, click File, New Task and enter EXPLORER.EXE to restart the GUI shell.
Close Task Manager.


Or you can try this

Open Notepad.exe

Click File>Save As..>

locate the folder where ur undeletable file is

Choose 'All files' from the file type box

click once on the file u wanna delete so its name appears in the 'filename' box

put a " at the start and end of the filename
(the filename should have the extension of the undeletable file so it will overwrite it)

click save,

It should ask u to overwrite the existing file, choose yes and u can delete it as normal


Here's a manual way of doing it. I'll take this off once you put into your first post zain.

1. Start
2. Run
3. Type: command
4. To move into a directory type: cd c:\*** (The stars stand for your folder)
5. If you cannot access the folder because it has spaces for example Program Files or Kazaa Lite folder you have to do the following. instead of typing in the full folder name only take the first 6 letters then put a ~ and then 1 without spaces. Example: cd c:\progra~1\kazaal~1
6. Once your in the folder the non-deletable file it in type in dir - a list will come up with everything inside.
7. Now to delete the file type in del ***.bmp, txt, jpg, avi, etc... And if the file name has spaces you would use the special 1st 6 letters followed by a ~ and a 1 rule. Example: if your file name was bad file.bmp you would type once in the specific folder thorugh command, del badfil~1.bmp and your file should be gone. Make sure to type in the correct extension.

Magics of alt key

to use special characters anywhere. you should hold alt key & press the following numbers in number pad. the result will return a special character.


0161-¡
0162-¢
0163-£
0164-¤
0165-¥
0166-¦
0167-§
0168-¨
0169-©
0170-ª
0171-«
0172-¬
0174-®
0175-¯
0176-°
0177-±
0178-²
0179-³
0180-´
0181-µ
0182-¶
0183-·
0184-¸
0185-¹
0186-º
0187-»
0188-¼
0189-½
0190-¾
0191-¿
0192-À
0193-Á
0194-Â
0195-Ã
0196-Ä
0197-Å
0198-Æ
0199-Ç
0200-È
0201-É
0202-Ê
0203-Ë
0204-Ì
0205-Í
0206-Î
0207-Ï
0208-Ð
0209-Ñ
0210-Ò
0211-Ó
0212-Ô
0213-Õ
0214-Ö
0215-×
0216-Ø
0217-Ù
0218-Ú
0219-Û
0220-Ü
0221-Ý
0222-Þ
0223-ß
0224-à
0225-á
0226-â
0227-ã
0228-ä
0229-å
0230-æ
0231-ç
0232-è
0233-é
0234-ê
0235-ë
0236-ì
0237-í
0238-î
0239-ï
0240-ð
0241-ñ
0242-ò
0243-ó
0244-ô
0245-õ
0246-ö
0247-÷
0248-ø
0249-ù
0250-ú
0251-û
0252-ü
0253-ý
0254-þ
0255-ÿ

Saturday, 3 September 2011

how to make super hidden files or folders

1. Open a command prompt

Click Start button-> select Run -> type "cmd" ( XP )

Click Start button-> type "cmd" in the seach box ( 7 )

2. Then press Enter


3. type "cd path_of_your_file" to go to place of your file

4. then type "dir" to view content of folder

5. then type "attrib +s +h file's_name" then press Enter
6. then view again with "dir" command

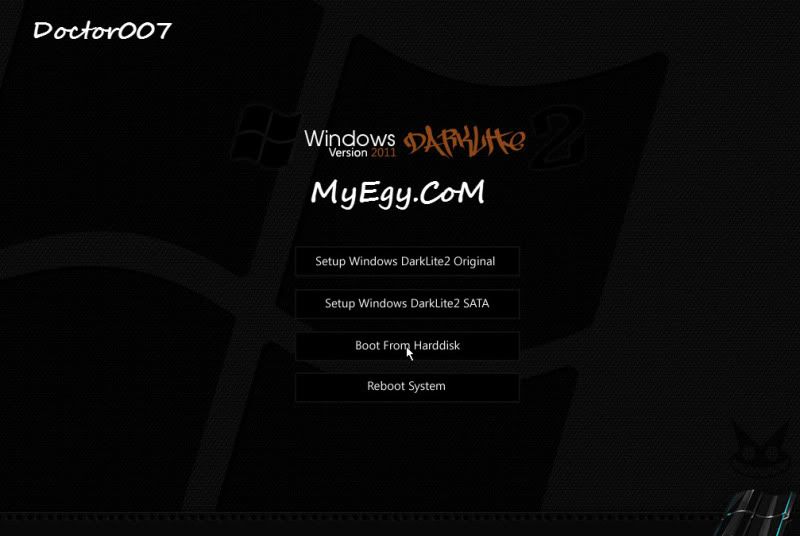
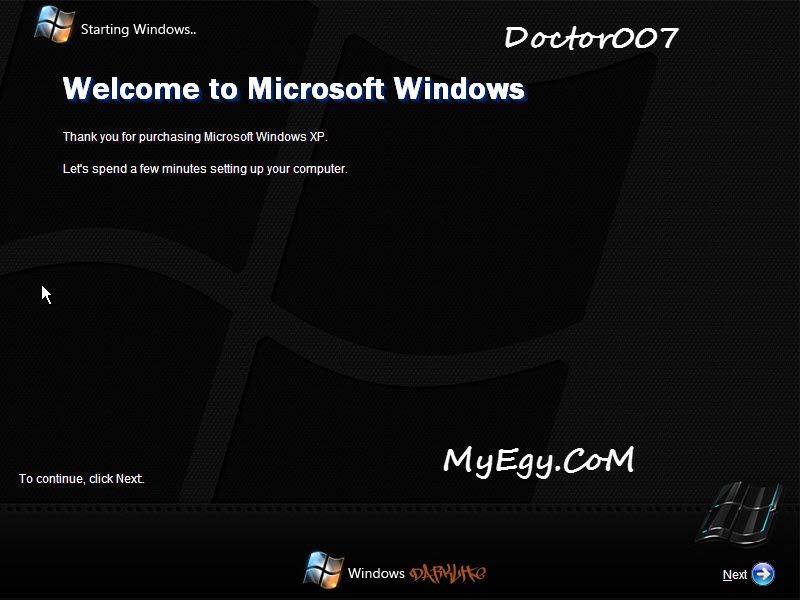
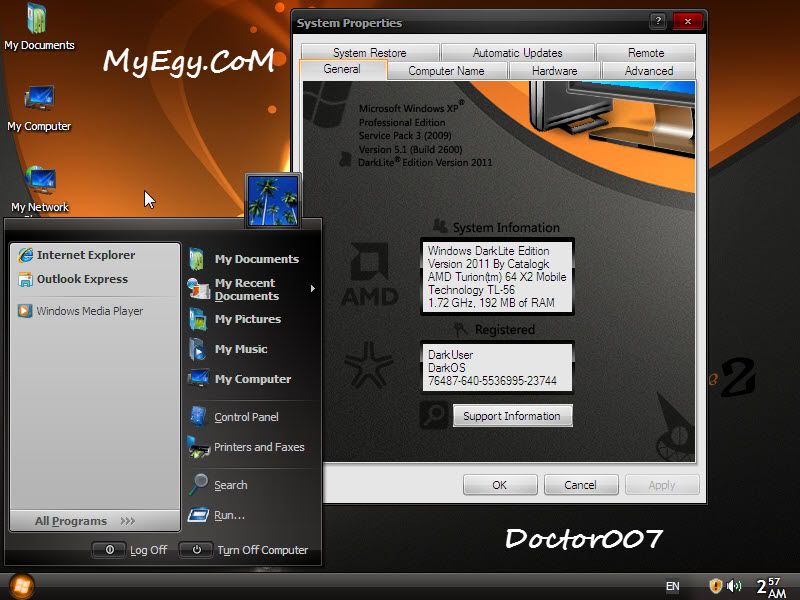
Windows Xp Sp3 DarkLite Edition (2011) SATA Version Activated Filesonic Hotfile download


Windows Xp Sp3 DarkLite Edition (2011) SATA Version Activated


Release Notes :-

The best XP OS in 2011have all update at Decemberhave a great graphic from "Catalog" designerOriginal, updateable and activatedno need serial , bootable

VIP Note :-

The Develpoer made two versions* SATA Version (have all updates and SATA driver only)* Driver Version (have all updates, SATA driver and all cheapest driver only)

This one here is SATA Version cuz its smaller (510 MB)and more faster than anther version

Screenshots :-


  • MBT Icons and buttons

    Tips And Tricks

    Our resources have been successfully got many tricks and tips and shared here too much. Check Yours!

  • choosing webhost for a blog

    Mobile Zone

    Mobile Reviews Shared with thier latest tricks and tips!

  • SEO Settings for blogger

    SEO

    Learn every single SEO tip that will boost your blog's ranking and organic traffic. We got them all!

  • Blogger widgets and plugins

    Check Softwares

    Why not take a tour of all great softwares? You Name it we have it!

  • become a six figure blogger!

    Get Facebook Tricks

    Learn Facebook Tricks!